Rhode Island Tomato Planting Calendar: Starting Indoors to Harvest
A Rhode Island tomato calendar is less about choosing a date and more about coordinating indoor growth, outdoor conditions, and the time your plants need to settle in. The challenge is avoiding seedlings that outgrow their pots or meet chilly weather too soon. Use the state calendar for local timing, then adjust your plans to your garden’s conditions.
How to use a Rhode Island tomato planting calendar
Tomatoes need a sequence of growing conditions, not just a date on a page. The useful calendar question is not simply “When can I plant tomatoes?” It is “When should I begin indoors so my seedlings are ready when my garden can support them?” Work backward from a suitable outdoor planting window, while staying flexible enough to respond to the weather.
The University of Rhode Island Cooperative Extension says the RI Planting Calendar gives guidance on the best times to start seeds indoors and when it’s safe to plant directly in the ground. For tomatoes, use that calendar as a local timing reference, not as a promise that every yard will be ready on the same day. Check the current calendar and consider your own planting spot before making a decision.
A planting window is especially helpful because Rhode Island gardens do not all warm and dry at the same pace. A bed in a sheltered spot may be ready before one exposed to wind or persistent dampness. A container on a sunny patio may warm differently from a bed beside a cool wall. Rather than treating the calendar as a deadline, use it to plan the next steps and look for signs that your plants and site are ready.
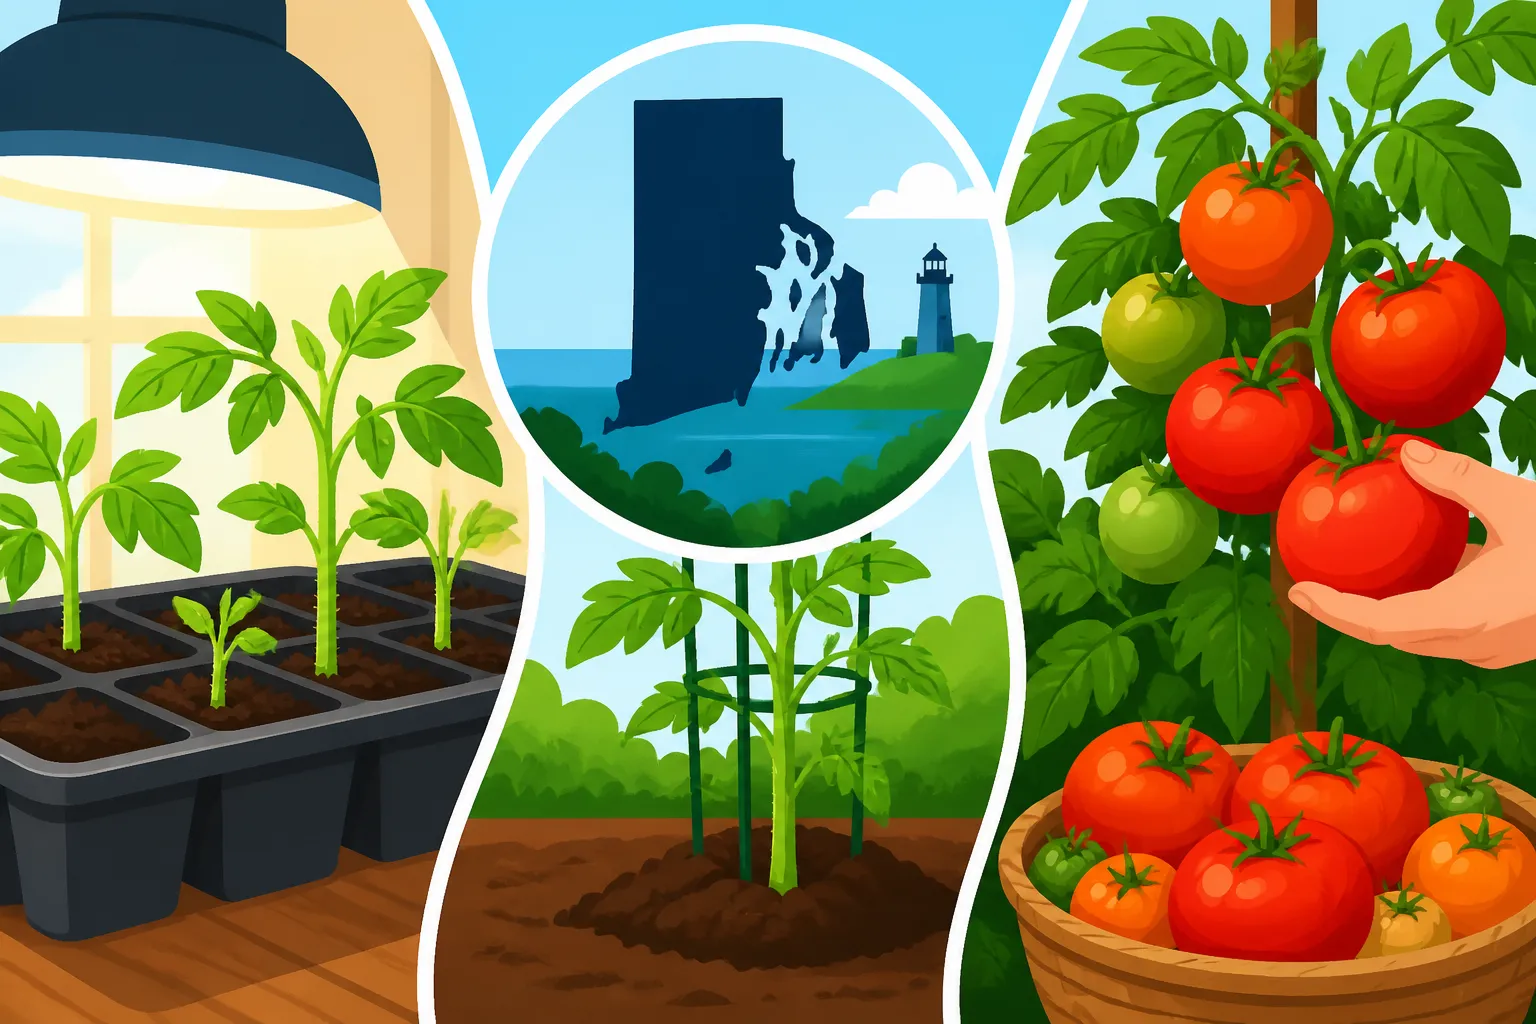
A practical planning sequence is:
- Check the RI Planting Calendar for the indoor-sowing and outdoor-planting guidance.
- Choose a tomato variety that fits your available space and intended use.
- Plan how you will provide adequate light and growing room indoors.
- Prepare the outdoor bed or containers before the seedlings need them.
- Watch the forecast and garden conditions as planting approaches.
- Harden off seedlings gradually before they move to their permanent location.
- Keep a flexible backup plan if cold, wet, or windy conditions delay planting.
The calendar will not settle every choice. The packet’s variety description, the available growing space, and the condition of your seedlings all matter. A compact plant suited to a container may fit a balcony or patio better than a vigorous plant that needs a large bed and substantial support. A variety selected for fresh eating may not be the best match if your main goal is preserving a harvest.
For help with seed-starting choices beyond tomatoes, see Rhode Island Seed Starting Calendar: When to Begin Your Spring Flats and Starting Seedlings Indoors: Lighting, Warmth, and Rhode Island Timing. If you are comparing indoor sowing with putting seed straight into a garden bed, Starting Seeds Indoors vs Garden Sowing on Rhode Island Dates can help frame the decision. Tomatoes are commonly managed from indoor seedlings, but the broader comparison is useful for planning the rest of the vegetable garden.
| Growing stage | What to plan | What to check before moving on |
|---|---|---|
| Seed choice | Match variety and plant habit to your space and intended use | Packet instructions and available support |
| Indoor sowing | Use the RI Planting Calendar to guide local timing | Light, moisture, warmth, and room for seedlings |
| Seedling growth | Keep plants growing steadily without crowding | Strong stems, healthy leaves, and adequate light |
| Outdoor preparation | Prepare the bed or container before transplanting | Drainage, sun exposure, support, and soil condition |
| Hardening off | Gradually acclimate indoor-grown seedlings | How plants respond to outdoor sun, wind, and cooler air |
| Transplanting | Move plants only when conditions and seedlings are ready | Forecast, soil condition, and the site’s exposure |
| Harvest | Check fruit for ripeness and handle it gently | Color, firmness, and the variety’s description |
Choosing tomato seeds and planning the indoor start
Start with the place where the tomatoes will grow. A seed packet may describe a plant as compact, tall, sprawling, or suitable for a particular kind of growing space. Those descriptions influence how many plants you can manage, what support they need, and whether a container is realistic. Before sowing, decide where each plant will go and make sure that space is available.
Think about how you like to eat tomatoes. Some gardeners want fruit for slicing, while others prefer smaller fruit for snacks, salads, or cooking. A variety’s description can help narrow the choice, but a packet cannot predict how a particular plant will perform in every yard. If you are selecting between several options, consider growing habits, fruit characteristics, and the care each one may require. Selecting Productive Tomato Varieties for Rhode Island Gardens and Choosing Disease-Resistant Tomatoes for Coastal and Inland Beds offer further help with variety selection.
Botanical Interests is one option for seed packets. Whichever supplier you choose, follow the instructions for the specific variety rather than assuming every tomato has identical needs. Check whether the packet describes the plant as suited to containers or whether it is expected to grow large and need firm support. Keep the packet accessible; its variety information can help you identify plants later and make sense of their growth habit.
Once you have a variety in mind, plan the indoor setup before sowing. Seedlings need enough light to grow sturdy rather than stretched and weak. A bright window may work for some setups, but light can be uneven or limited. If seedlings lean strongly toward the light source or develop thin stems, the growing area may need adjustment. A suitable grow light, positioned and used according to its instructions, can help provide more consistent light.
Use clean containers that drain, along with a suitable seed-starting medium. Garden soil can be heavy or uneven in texture for small containers, and it may not provide the loose, consistent conditions that young seedlings need. Label containers clearly with the variety name. If you sow more than one variety, labels prevent confusion once the plants look similar.
Moisture requires attention but not guesswork. The growing medium should remain appropriately moist for germination and early growth without becoming waterlogged. Containers without drainage can leave roots sitting in excess water. Check the medium itself rather than watering automatically on a schedule: surface appearance alone may not tell you whether the root area is too dry or too wet.
Warmth also matters during germination and early growth. Use the seed packet’s guidance for the variety and the equipment you have. Once seedlings emerge, their needs shift toward strong light and steady care. Keeping the growing area comfortable for people is not a reliable way to judge what a seedling needs, so use the packet and equipment directions rather than a guess.
The aim indoors is not to produce the biggest possible plant. A seedling that has grown too tall, crowded, or root-bound can be harder to handle than a compact, healthy plant. Give seedlings space as they grow, and avoid letting leaves remain pressed together in a dense cluster. If stems are stretching, improve the light conditions before reaching for more fertilizer or water. Extra feeding cannot correct a lack of light.
As plants develop, watch for signs that they need more room. Roots emerging from drainage holes, a root mass that fills the container, or rapid drying of the growing medium can indicate that a seedling may benefit from being moved to a larger container. Handle plants gently and avoid damaging the stem or roots. Use clean containers with drainage and a suitable growing medium for the move.
Indoor timing is a balance. Sowing too early can leave seedlings large and difficult to manage before outdoor conditions are suitable. Sowing too late can mean smaller plants when the garden is ready. The RI Planting Calendar helps locate the local window; the seed packet and the pace of your seedlings help you decide how your own indoor schedule is going. For more on diagnosing stretched growth, see Leggy Seedlings: What Indoors Tells Rhode Island Gardeners.
Preparing seedlings for the move outdoors
Moving a tomato from a protected indoor space straight into full outdoor exposure can be a shock. Indoor plants have not had to deal with changing sunlight, wind, or the full range of outdoor conditions. Hardening off is the gradual adjustment that helps seedlings adapt before they are planted in their permanent spot.
Begin the adjustment when the planting window is approaching and the outdoor conditions allow it. Start with a protected location and limited exposure, then gradually increase the time and intensity outdoors as the plants tolerate it. Avoid treating hardening off as a single outing. The purpose is to let seedlings adapt over a series of outings, with the pace guided by the weather and by how the plants respond.
Bright outdoor sun can be more intense than light coming through a window. Wind can dry or bend tender stems, and a cool night can set back a plant that has been kept warm indoors. Choose sheltered conditions for early outings, and bring plants back to protection if weather turns unsuitable. If a seedling wilts, develops scorched foliage, or looks stressed after an outing, reduce exposure and give it time to recover before increasing the challenge.
Keep the plants watered appropriately during acclimation, but do not leave them standing in water. Outdoor air can dry containers faster than indoor air, while a cool, cloudy spell may slow drying. Check the growing medium and the drainage rather than relying on a fixed routine. A plant in a small pot may dry out sooner than one in a larger pot, and a breezy location may need closer attention.
A transplant-ready seedling should be sturdy enough to handle, with healthy foliage and a root system that holds the growing medium together. A plant that is too small may struggle to establish, while an overgrown plant can be awkward to transplant and may have crowded roots. Look at the whole plant, not only its height. Strong stems, healthy leaves, and steady growth are more useful signs than size alone.
The outdoor site should be ready before the seedlings leave their containers. Prepare the bed or container, arrange supports, and make sure water is accessible. That reduces the time roots spend exposed during transplanting and prevents last-minute scrambling to find a stake or suitable location. If you expect a spell of rough weather, delay the move rather than trying to make a fragile seedling cope with conditions it has not experienced.
For a detailed walk-through of the transition from indoor seedlings to the garden, see Hardening Off and Transplanting Rhode Island Tomato Seedlings. If you are weighing a cautious approach to tender crops, Waiting Past the Mid-May Frost Date for Rhode Island Warm Crops discusses the reasoning behind avoiding an overly early move; use the calendar and current local conditions rather than treating any seasonal milestone as a guarantee.
Choosing and preparing an outdoor growing site
Tomatoes need a place with suitable light, drainage, and room for the plant to grow. Before planting, observe the site during the day and consider whether nearby buildings, fences, or trees shade it. A spot that seems bright during one part of the day may not stay that way. The plant’s eventual size matters too: a site that looks roomy when seedlings are small can become crowded as foliage expands.
Good drainage helps prevent roots from sitting in waterlogged soil. If a bed stays wet after rain, investigate the cause before planting. A raised bed or container may offer more control in some situations, but drainage still needs attention. Containers must have drainage openings, and a bed should not be prepared in a way that leaves water trapped around the roots. How Soil Compaction and Drainage Affect Rhode Island Plants provides more background on how soil structure can influence garden growth.
Prepare the planting area ahead of time. Clear competing vegetation, loosen the soil as appropriate, and incorporate suitable organic matter if the bed needs improvement. Avoid adding fertilizer by habit. Soil condition and the crop’s needs matter, and excessive or poorly chosen amendments may create problems rather than solve them. For broader soil preparation, see Improving Garden Soil: Organic Matter, Compost, and Mulch. If you are unsure whether a bed needs a specific amendment, check appropriate local guidance before applying it.
Plan support before the plants become large. Tomato cages, stakes, or other supports are easier to set in place before roots fill the area and stems become heavy. Choose a method that matches the plant’s growth habit and the space available. A support that is too small or unstable can fail once the plant carries foliage and fruit. Secure the plant without constricting its stem, and check ties as growth continues.
Spacing should allow plants to receive light and air and give you room to inspect and harvest them. Follow the seed packet or transplant label for spacing guidance, since growth habit varies. Crowding can make it harder to reach fruit, manage weeds, water at the base, or notice developing problems. If your space is limited, choose a variety whose described habit suits it instead of squeezing a large plant into a small spot.
Containers can work where a garden bed is unavailable, but they require deliberate choices. Use a container that can accommodate the variety’s growth and provide drainage. A small pot may dry quickly and restrict roots, while a large plant without adequate support can become unstable. Place the container where it receives suitable light and is practical to water. Keep in mind that container growing does not remove the need to monitor moisture and plant health.
A site near a wall, paving, or sheltered corner may have different conditions from an open garden. These small differences can affect how quickly the growing medium dries and how exposed plants are to wind. Do not assume the warmest-looking nook is automatically best: poor airflow, limited light, or restricted space may outweigh any benefit. Compare the actual conditions across the day and choose the place where the plant can be cared for consistently.
For gardens near the coast or in exposed locations, wind and damp air can influence how a bed performs. Planting Coastal Rhode Island Beds Exposed to Damp Marine Air and Protecting Exposed Coastal Rhode Island Garden Beds From Wind provide site-specific context. More generally, Adjusting Rhode Island Planting Dates to Your Microclimate is useful when your yard seems to behave differently from a broad regional calendar.
Transplanting, watering, and supporting plants through the season
Choose a suitable planting moment by checking both the RI Planting Calendar and the conditions in your garden. A calendar can guide timing, but cold or wet weather can make a planned day a poor choice. Soil that is saturated, a strong stretch of wind, or a forecast that could stress tender seedlings are reasons to pause and reassess. The goal is to move a prepared plant into a garden that can support it, not to meet a date regardless of conditions.
When you are ready, water seedlings as needed before handling them so their growing medium is not parched. Remove each plant from its container carefully, supporting the root area rather than pulling on the stem. Set it into the prepared soil, firm the soil gently around the roots, and water the planting area so the root zone settles in. Avoid crushing the stem or compacting the soil heavily.
After transplanting, monitor plants for signs of stress. A short period of adjustment is not unusual, but persistent wilting, damaged foliage, or a plant that fails to resume growth deserves attention. Check the growing medium and the weather before assuming the plant needs fertilizer. Transplant stress, uneven watering, and unsuitable site conditions can all affect appearance. Address the likely cause rather than applying amendments without a clear reason.
Water at the base when practical, aiming to moisten the root area rather than repeatedly wetting the foliage. The amount and frequency depend on the weather, soil, container, and plant size, so a fixed schedule is not a reliable fit for every garden. Check the soil beneath the surface. A dry surface does not always mean the roots need water, and a damp-looking surface can hide dry soil below.
Mulch can help reduce moisture loss and limit soil splashing onto lower foliage. Keep mulch arranged so it does not press tightly against the stem. The best choice depends on what is available and appropriate for the bed. Do not use mulch as a substitute for checking soil moisture; conditions below the surface still matter.
As plants grow, guide stems into their supports and inspect ties or clips so they do not pinch. Keep the area around the base accessible enough to water, weed, and inspect. Remove damaged or diseased plant material when appropriate, using clean tools and sensible hygiene. Avoid unnecessary pruning, especially if you are unsure how the variety grows or what a particular cut will do.
Watch for changes rather than reacting to every leaf blemish. Leaves may show stress from water, weather, or other growing conditions, and similar symptoms can have different causes. Look at where the problem appears, how quickly it is spreading, and whether other plants show the same issue. Take clear photographs and seek reliable diagnostic guidance if the cause is uncertain. Avoid applying pesticides or other products based on a guess; follow the product label for any product you use.
Weeds compete for space and can make it harder to inspect plants. Remove them while small, taking care not to disturb tomato roots. Keeping the bed accessible also makes it easier to check soil moisture, secure supports, and pick ripe fruit. Consistent observation is more useful than waiting until a plant looks severely stressed.
If growth is poor, work through the conditions systematically:
- Check whether the plant receives suitable light.
- Feel the soil below the surface to assess moisture.
- Look for standing water or signs that drainage is poor.
- Inspect the stem and leaves for physical damage or unusual changes.
- Confirm that the support is stable and not constricting the plant.
- Review the seed packet or plant label before changing care.
- Seek a reliable diagnosis when symptoms persist or spread.
Tomatoes may stall when conditions are unfavorable, and a slow period does not always mean a plant is lost. Give the plant stable care while checking for a specific cause. Avoid overcorrecting by watering heavily, adding fertilizer, or pruning extensively without evidence. For more context on weather-related setbacks, see Why Rhode Island Summer Crops Stall Under Cold Nights or Heat.
Harvesting tomatoes and making the next planting decision
Harvest depends on the variety and the conditions in the garden. Check the seed packet for the expected fruit characteristics, then use color, firmness, and the fruit’s feel as practical cues. A tomato does not need to be left on the plant until it becomes overly soft. Handle ripe fruit gently, since bruising can shorten the time it keeps well.
If fruit has begun to color but the weather turns unsuitable, the plant may not be the best place to leave every tomato. Inspect fruit regularly and make choices based on its development and the conditions ahead. Avoid picking immature fruit simply because the calendar has advanced; the plant’s progress and the fruit’s condition matter more than a generic harvest date.
Harvesting often is a useful way to keep track of ripening and notice changes in the plant. Pick fruit with care so stems and nearby clusters are not damaged. If a tomato does not come away easily, avoid tugging hard. A clean cutting tool can help where needed, and it should be handled safely and kept clean.
Use ripe tomatoes promptly or store them according to their condition and intended use. Do not assume that refrigeration is the best choice for every ripe tomato; Why Ripe Backyard Tomatoes Should Never Be Refrigerated covers storage considerations. For guidance on handling garden produce safely, see Safe Harvesting Rules for Rhode Island Backyard Vegetables and Washing Garden Produce: Water Temperatures and Vinegar Rinses.
Keep a simple record of what worked. Note the variety, where it grew, how the indoor seedlings developed, and whether the planting site stayed wet or dried quickly. Record when you sowed and transplanted if you want to compare your experience with the RI Planting Calendar in a future season. This record is most useful when it includes conditions, not just a date: a windy site, a sheltered bed, or a container may have influenced results.
At the end of the season, remove plant material thoughtfully and clean supports and containers before storing them. If foliage showed persistent disease symptoms, avoid casually placing affected material in a spot where it may cause future problems; seek appropriate local guidance on disposal. Clear the bed and consider what the next crop or cover might be, rather than leaving soil exposed without a plan.
The same calendar approach can help with other vegetables, but each crop has different timing and needs. For a wider view of sowing and harvesting across the state, see Vegetable Planting Calendar for Rhode Island: Sowing to Harvest. A tomato plan that starts with a local calendar, adapts to the garden, and stays attentive to plant condition is more dependable than a rigid date alone.
Frequently Asked Questions
When should I start tomato seeds indoors in Rhode Island?
Use the RI Planting Calendar for the local indoor-sowing window, then follow the seed packet and consider how much light and growing space you can provide. The right plan also depends on how quickly your seedlings develop.
Is a calendar date enough to decide when to transplant?
No. Use the calendar as a planning reference, then check the forecast, soil condition, plant readiness, and exposure of your site. A cold, wet, or windy spell may make waiting the better choice.
Can I grow tomatoes in containers?
Yes, if the variety and container suit each other. Choose a container with drainage, plan for support, and monitor moisture because container conditions can change quickly.
Why are my tomato seedlings tall and thin?
Insufficient or uneven light is a common reason seedlings stretch. Check the light setup and give seedlings enough space. See Leggy Seedlings: What Indoors Tells Rhode Island Gardeners for more troubleshooting.
Sources
- University of Rhode Island Cooperative Extension — Gardening Resources – Cooperative Extension (checked November 15, 2026)
Disclaimer
This article is for general informational purposes only and does not constitute professional advice. Laws, prices and regulations vary by location and change over time. Consult a qualified professional for guidance on your specific situation. Rhode Island Gardening Guide is not a government agency and is not affiliated with any university extension, state department of agriculture or other government agency.